Microblading is nothing new, it’s actually been around for years, but with the rise in semi-permanent make up and trends around big, bushy eyebrows becoming trendy, everyone is after the perfect brow.
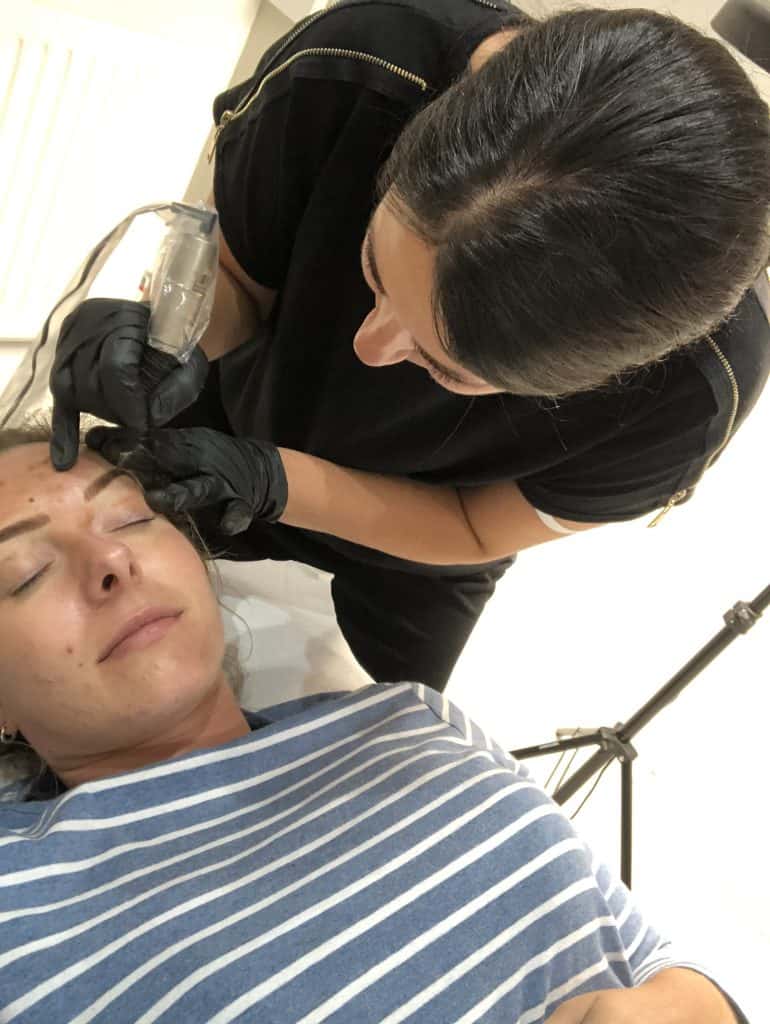
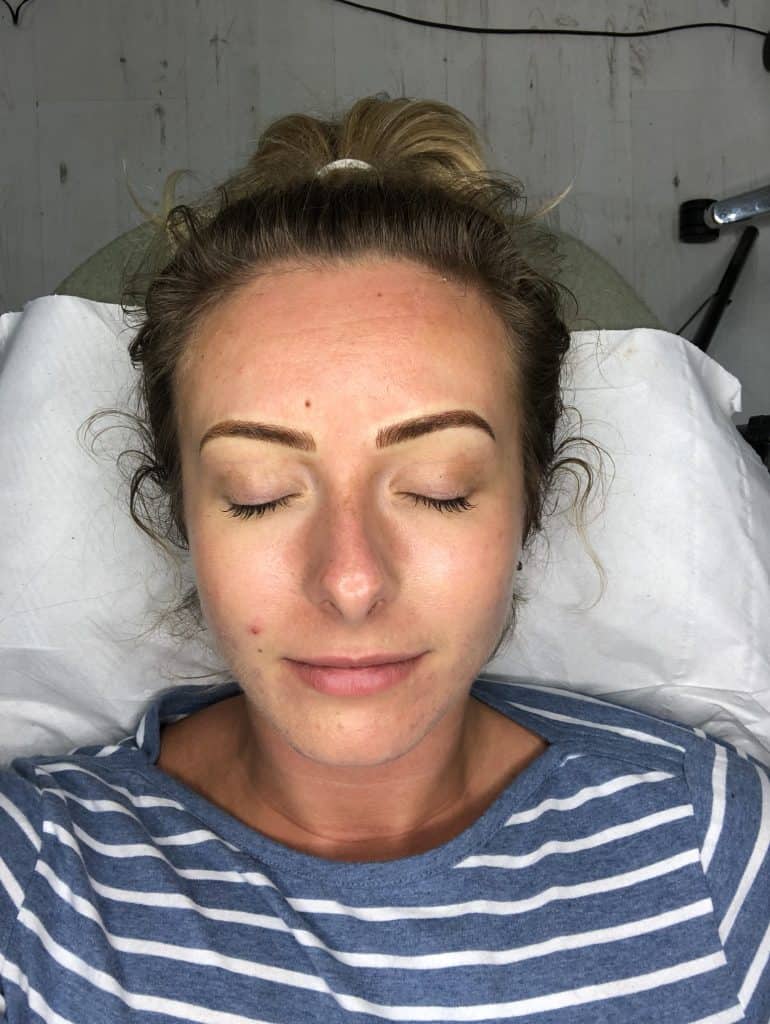
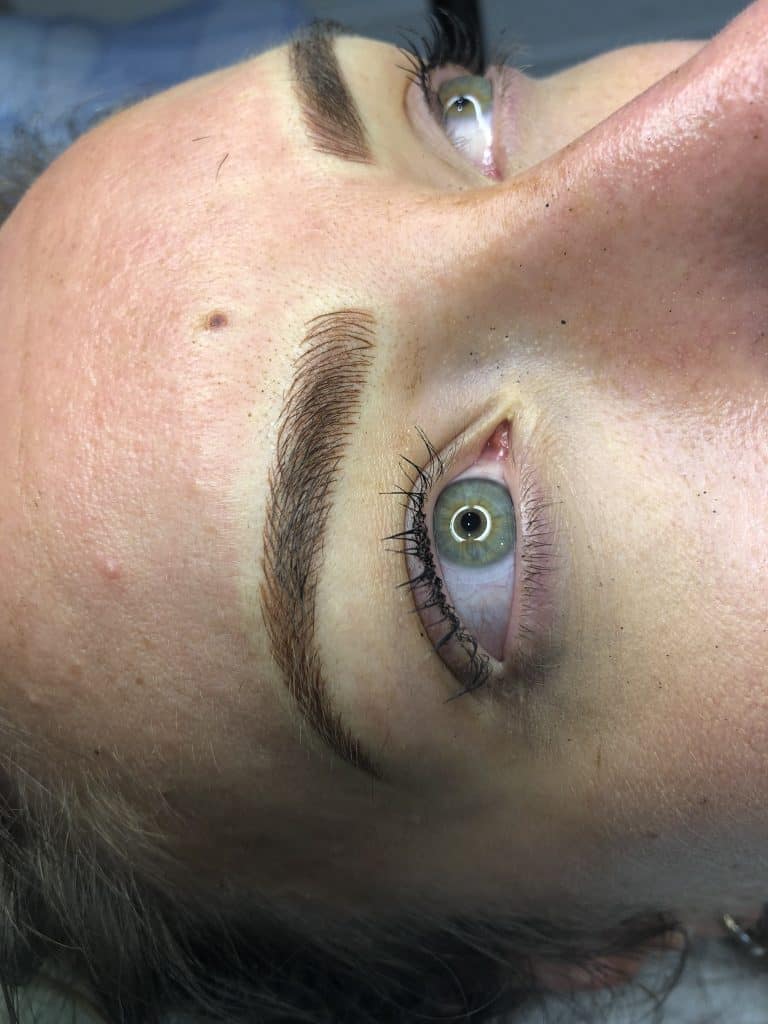
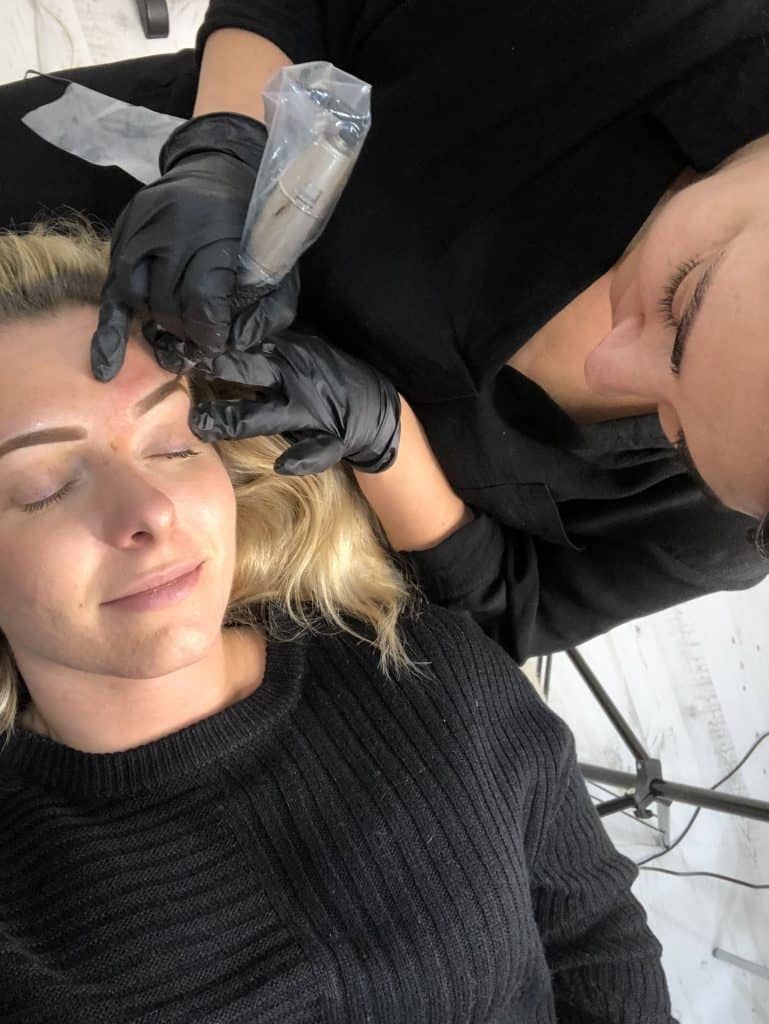
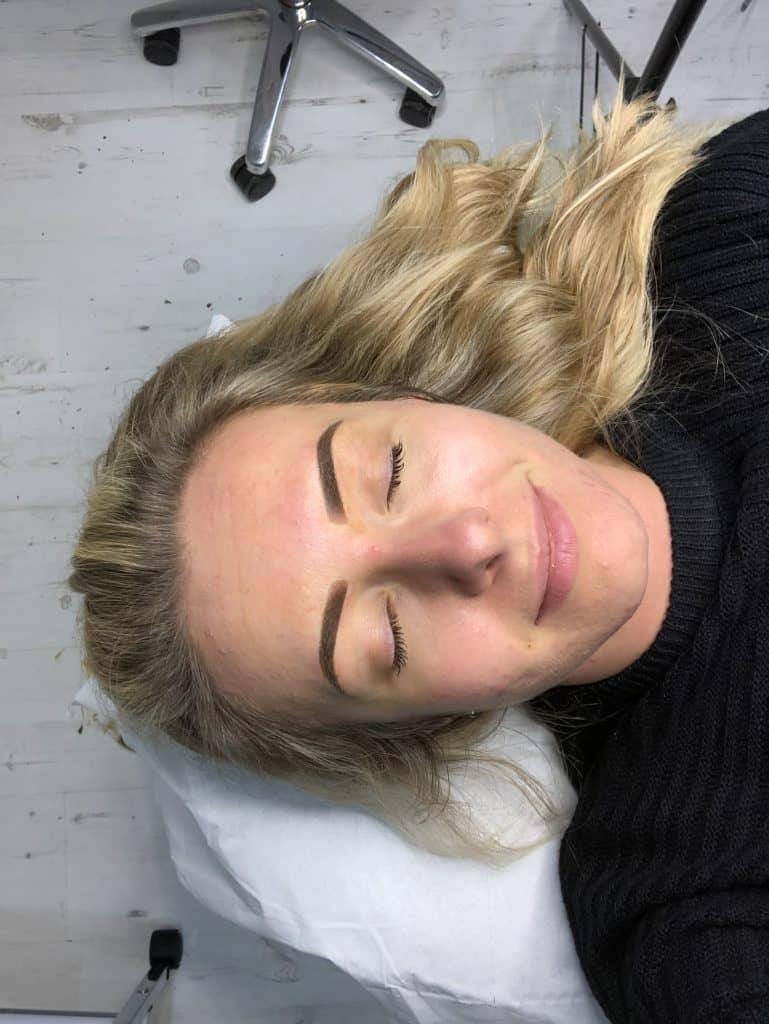
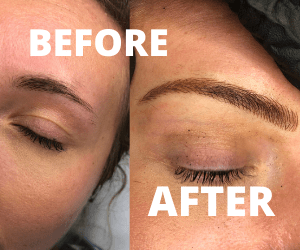
In this blog post I run through my experience of eyebrow microblading, as well as before and after microblading photos and my personal experience of microblading aftercare.
Whether you admire the girl in your gym class with the amazing brows, or the supermodel walking down the runway, everyone has the chance to get the brows they deserve.
However if you are anything like me, you destroyed your eyebrows in the late 20’s and god knows why, but thin brows were in.
10 years later, thanks to Cara Delevingne, brows were back in. But it mean’t many people, like myself, had plucked so much, that there wasn’t much left.
The semi-permanent secret to faking fuller eyebrows that look totally natural, eyebrow microblading might just be the hassle-free solution to spending hours pencilling in your eyebrows only to get the shape so completely wrong.
And that’s why at the end of 2019 I decided, ahead of our wedding, I wanted to get eyebrow microblading. After months and months of looking around, doing my research and saving up, I stumbled across a lovely woman called Katie Elizabeth Permanent Cosmetics, who is based in Milton Keynes.
[KEEP READING FOR 10% OFF DISCOUNT CODE]
What is Microblading
Microblading is the art of applying semi permanent brows to your current set of brows using special pigment.
The result of eyebrow microblading creates a beautiful and perfectly shaped brow (based on what you’ve asked your therapist to do – she should chat with you about the shape you want before she begins) that looks make-up ready without any fuss or hassle.
Eyebrow microblading can instantly add dimension and depth to your face.
The process is very precise thanks to the tool that is used (like a small pen knife) or a pen with a sloped blade with 10-12 little needles at the end – needles that don’t penetrate the skin but instead lightly scratch the surface, much like a paper cut.
I also had the process of blending to top my eyebrows up, which also worked effectively on my skin. Your therapist will run through your options, and you will be able to see which treatment works best on your type of skin.
The needle very finely implants featherweight strokes with a medical grade pigment on the epidermis layer for the skin, creating fine, realistic and natural hair strokes.
The entire procedure lasts around 3-4 hours and afterwards you walk out with perfect brows that will last up to 15 months before they start fading.
It is usually recommended that you go for your first session, with a second session around six weeks later for a ‘top-up’.
Microblading is different to getting your eyebrows tattooed, as the needle is much thinner, and does not penetrate the skin as much as a tattoo does. And that is also why eyebrow microblading does not last as long as a permanent tattoo.
How much does eyebrow microblading cost?
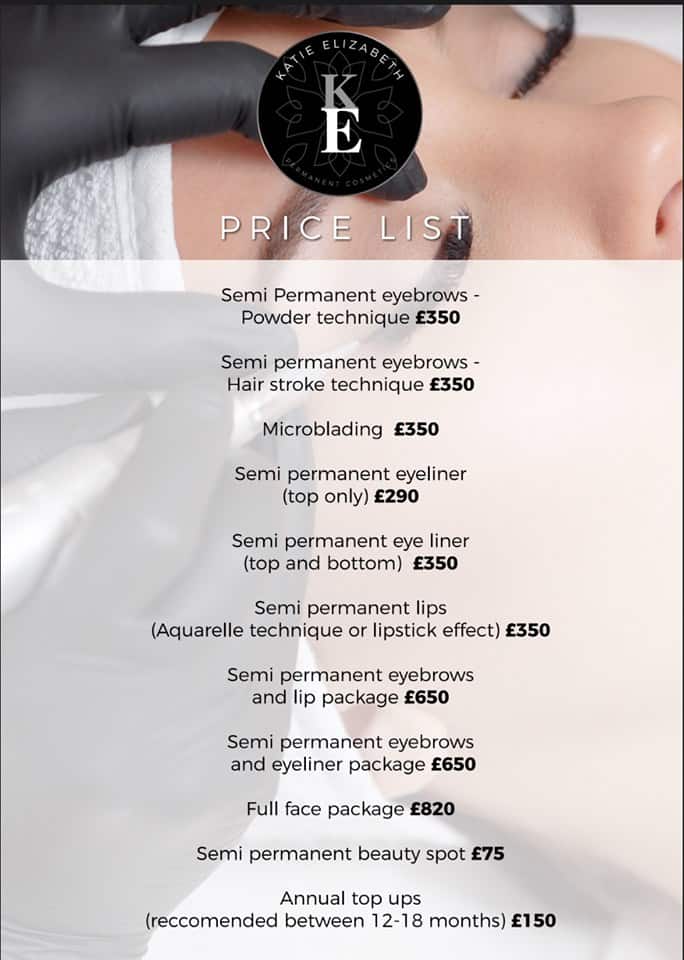
An eyebrow microblading treatment with Katie Elizabeth Permanent Cosmetics costs £350. This includes a consultation, the initial treatment as well as a top up treatment after 6-8 weeks.
Annual top ups between 12-18 months cost £150.
Does eyebrow microblading hurt?
I have quite a low pain threshold, so found it quite painful, The pain, however, isn’t like a tattoo pain, its much lighter, but tends to sting slightly more. And once you’ve got the numbing treatment on, you should find the pain subsides.
It’s sometimes the sound of the blade which people find worse as it’s a rather acute scratching sound.
The whole process takes 3-4 hours, but you won’t be under the needle for the whole time, the treatment actually takes about 90 minutes, but with the consultation, the sketching of the brows using pencil, the numbing treatment and then the post-treatment care chat.
How long does eyebrow microblading last?
Microblading lasts anything between 12-18 months, but the length of the pigment will depend on your skin type. If you are like me and have oily skin, the pigment may last slightly less time, of around 12 months before needing to get a top up.
My Experience of Eyebrow Microblading
Here’s a short rundown of my experience of microblading eyebrows, as well as before and after microblading photos and my microblading aftercare tips.
- The therapist will sit you down, talk about what you want, the colour, shape and style.
- The therapist will then shape the brow area by threading or plucking the hairs, cleaning up the area and preparing it for the treatment.
- Then it’s time for numbing…. The numbing cream usually takes around 20-30 minutes to work, so they may put this on first so it begins to numb before they begin.
- While this is working the therapist will then begin measuring the area around the brows, taking into account face shape, symmetry, facial features etc. and draw out your brows using a pencil.
- Then your therapist will begin the eyebrow microblading process. They will start implanting the the pigment in to your eyebrows using the featherweight strokes. Each stroke is a small cut to the skin where your therapist will place the colour pigment, so it can seep in and settle there.
- If there is any discomfort at this stage your therapist may add another quick layer of numbing cream to the area.
- Then once the therapist has gone over the entire brow and filled in the shape, they may add on a final layer of pigment that stays on for 5 minutes, clean the area and then you are done!
- And remember to get yourself booked in 6-8 weeks later for a top-up session to fill in any gaps where the pigment hasn’t taken or healed properly.
Eyebrow Microblading Aftercare Tips
Once you’ve had your treatment, you’ll need to follow the aftercare instructions are given by your therapist (see below) and you MUST avoid any picking or scratch on the eyebrow.
Then over the coming 10 days, your eyebrows will start to heal over, much like a tattoo.
Over the ten days your brows will change colour, shape and may start to flake. Initially, it may look like they have faded, but over the ten days, they will reveal their final colour and shape.
- Avoid getting the area wet for up to 5 days
- Keep your face dry even during a shower for up to 48 hours
- Don’t wear makeup on your eyebrows, or near, for at least a week
- Do not have botox for three weeks
- Avoid saunas, swimming, and excessive sweating until the area is completely healed
- Don’t pick at the flaking skin, or pull of scabs on the eyebrow area
- Do not have any type of facial or peel two weeks prior
- Keep your hair away from your brow line
- Do not exercise on the day of the treatment (before)
- Apply any medicated cream given to you by your therapist as directed
- Do not get your brows waxed or tinted three days prior
- Stop using any retinol or Vitamin A products one month prior.
**DISCOUNT CODE**
FOR 10% FOR FIRST TREATMENT USE CODE BROWS20
You can also find me on social media: Facebook, Twitter, YouTube and Instagram.
Other posts that may help you:
The Best City Breaks for Couples
Beginner’s Guide to Europe Interrail Routes
Copenhagen Chic at the Andersen Hotel
Best Vegan Restaurants in Malmo
Ultimate Guide to a Weekend Break in York
10 of the Best places to eat Brunch in London
The Best Weekend Trips in the UK
Sign up to AirBnB with this link and receive a £23 off your first booking.
To receive my articles and reviews straight to your inbox SUBSCRIBE HERE.
Did you know I also vlog my trips? Make sure you subscribe to my YouTube channel so you get alerted when all my travel videos goes live… CHECK THEM OUT HERE
Thank you for reading and as always happy adventuring!
If you’ve enjoyed this post, please share it for me with all your friends and family!
Sophie X

